|
Repairing HP
DesignJet , Z3100, Z3200ps, Z Series Printers
HP Z3200 BELT
REPLACEMENT by Mark Lindquist
Repairing Z3200 Printers - Notes on Tools,
Materials, and Procedures
Mark Lindquist 12/10/2014 - updated --1-03-2017
THE
HP Z3200 DREADED SHREDDED BELT ISSUE
- Part 2
REPLACING THE CARRIAGE BELT ON Z2100-Z3200ps PRINTERS: Prepping for
the job
TOOLS, PARTS, and MANUAL
I always work with my tools organized, knowing I have mostly all that
will be required.
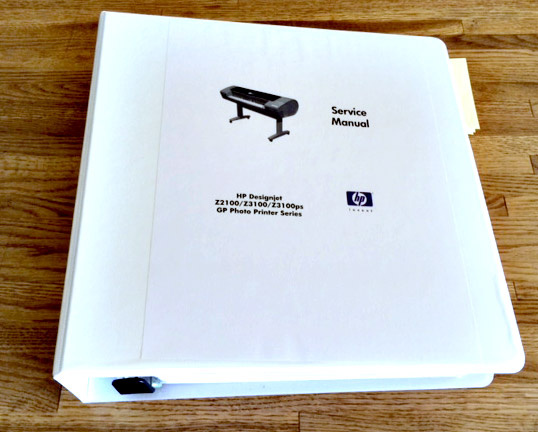
One of the most important resources you can have is the Service Manual.
Here is a
Link to
the Service Manual - it's a very large file and takes a long
time to download.
These are the tools I used:

The 6 piece Torx Set is critical.
I got mine at Amazon.
Wiha 45598 Screwdriver Sets, Torx, Cushion Grip, Precision Black Tip,
T6 to T15, 6 Piece. Wiha 45598 Torx 3K series screwdriver set. Six
piece torx blade CVM steel, hardened, precision black tips. Wiha 3K ergo
handle, cushion grip. Set includes T6, T7,T8, T15, T9, T10 and T15.
You don't need to use the Milwaukee cordless screwdriver, but since I
already had it, I used it in some cases just to unscrew screws, NOT to
screw them back in, except for the straps in the back of the printer.
Everything can easily be done by hand. Note the extender driver.
It comes in handy for many purposes. I also had a few worn out
cotton T-shirts for rags, and of course a Shop Vac. The Micro
Cleaning Kit is discussed below.
I've had the driver set (in orange, above for years and years.
Something similar might be the
DEWALT DW2166 45-Piece Screwdriving Set:
If you want or need to magnetize your torx bits to help with
keeping the screws on the end of the torx bits, just get a magnet and
rub them back and forth on the magnet. Test then with the screws
to see how well they hold. If you want to increase the strength,
just rub them on the magnets longer.
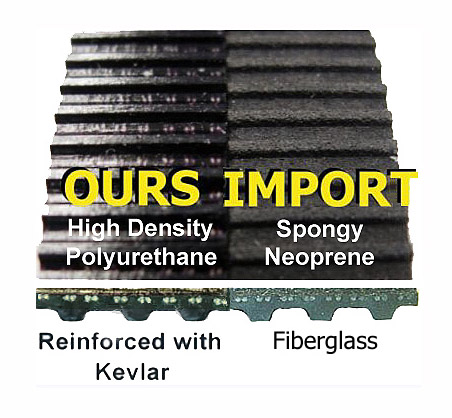
ABSOLUTELY CRITICAL
IS BUYING THIS AND ONLY THIS SPECIFIC LPS BELT FOR
YOUR PRINTER:
24”
Belt
|
44”
Belt
*Note: All ZSeries Printers share parts in common. Z2100, Z3100,
Z3200, Z3200ps, etc., ALL the same except lengths.
*NOTE: I do not recommend buying the kit LPS sells, just get the
belt.
You will need to get some extra torx bit screwdrivers that the kit does
not have.
ANY OTHER PARTS FOR THE HP Z3X00 YOU NEED ARE AVAILABLE HERE:
LPS has replacement parts pretty reasonably.
http://partshere.com also has many parts for the various printers.
For maximum success, prepare yourself as I suggest above, and get all
the tools Bryan suggests, and begin slowly and methodically. Take your
time and document what you are doing and have done. The estimates that
say 2- 3-5 hrs are WRONG. When you get into it, you’ll find things that
need replacing, and it’s a good idea to take a break in between
procedures or you’ll fry your brain.
While the Printer is torn down, think about replacing the fan and the
rear carriage bushing. Inspect everything while cleaning it. If the
encoder strip has any ginks in it or and spots that won’t come out find
one and replace it.
A few words of advice: Make sure you actually have the user manual and
the service manual either on a portable machine or printed out before
you undertake the project. I simply printed the entire document out on
my Canon PIXMA pro 100 in draft or fast mode and took the entire ream to
a local office depot and had them punch the pages and I bought a large
three ring binder and have a hard copy of the manual which comes in very
handy. I like having the manual printed out on standard copy paper in a
three ring binder because it's easy to make notes on the backs of pages.
It was pointed out to me by the Office Depot person that it would not be
good to spiral-bound the manual because sometimes pages get torn out and
with the three ring binder it's easy to replace. Good idea, as well, to
use handy tabs to mark the sections.
I also have a laptop (iPad) nearby the printer while working on it and I
have the manual queued up on the screen in my office to be able to make
quick reference. Jumping around the manual is par for the course when
working on these printers.
It's a necessity to have an I phone handy or other phone/camera that
takes quick and accurate photos. In every step along the way it's best
to document what you're doing so you can refer back. Always bear in mind
that the video that is a lifesaver only runs one way, meaning that it is
about taking the printer apart, not putting it back together. I had
toyed with the idea of recording the video and playing it backwards and
recording it being played backwards and did fool with that somewhat but
finally decided it just wasn't worth it. Instead, I basically made notes
about each section and I was able to go to the video based on the
timeline so I could play that section over again as many times as needed
until I got it.
When working on these printers what will serve you best is to work
fastidiously. Keep notes, keep photos, keep a journal, and keep track.
If you do these things you will be successful. I got a few different
size re-sealable sandwich type bags so that I could keep the screws for
each section being torn down taped to each major part. I used yellow
sticky notes and put them inside the bags so I knew what part went
where.
I can't stress enough is how important organization and recordkeeping is
when working on the printer. When it is torn down it is a pile of parts.
If the parts are unorganized, the pile becomes junk.
One of the things that I did originally while working on the printer was
to clean everything as I went along. Clean as you go is a great way to
bring the printer back to as new condition. I found a miniature brush
and crevice tool for cleaning computer parts and keyboards and I hooked
it all up to a shop vac. I put a HEPA filter in the shop vac just to
make sure it wasn't spewing out whatever crud that had accumulated
inside of the printer. I will say it's probably a good idea not to use
canned air in the printer due to the fact that shredded belt parts,
paper, lint and overall crud will just get blown around. If you have
to use canned air use it in conjunction with the vacuum. You can get the
Micro-Cleaning kit on Amazon or possibly Home Depot, etc. Just Google
it.

Whenever you take a part off the printer such as an end cap, just clean
it, first with the brush on the vacuum, then with the soft cotton cloth.
If you need to just use a little bit of warm water and possibly a little
warm soapy water dish soap would be best. It's actually important to
think of it as a restoration, and with a bunch of TLC in the end your
printer can look and function largely as though brand-new.
NEXT =>
(HP Z3200 Printhead Guide Rod Lubrication)
This is a journal about my printers. These are my own personal notes
about repairs and maintenance
I have done to my printers. I have made this web site mainly for my own benefit
so that I have a
record of what I have done. It is free for anyone to view. If you use this information
do so at
your own risk - I assume no responsibility for errors. If you find
any links that are not working
just copy and paste them into your browser. Some may be obsolete.
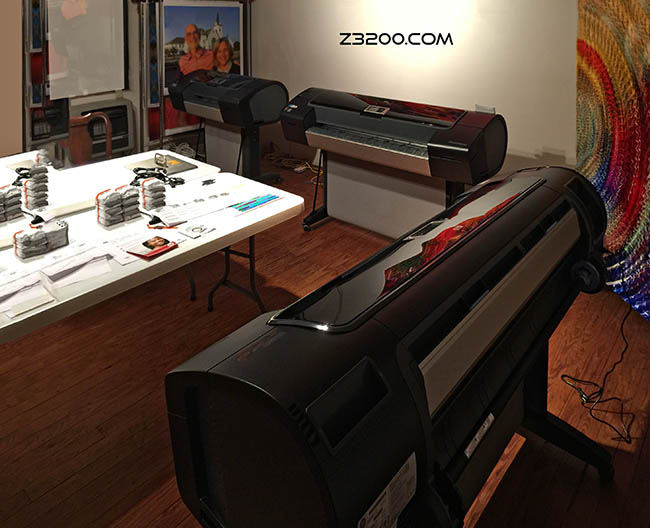
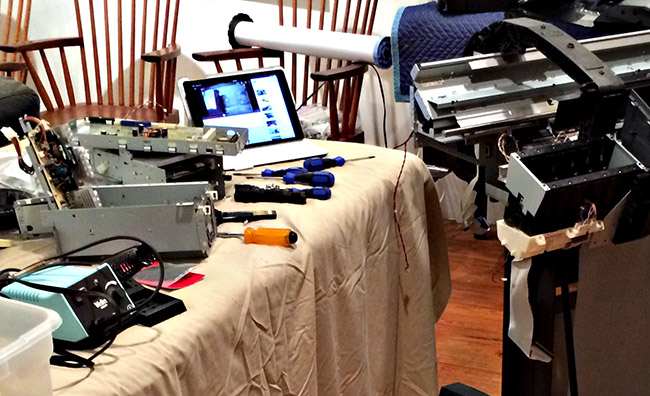
Above: The Lindquist print studio with 3 HP Z Series printers, 3200 and
3200ps.
A fourth Z Series printer is in another room. The third Z3200ps is
being
set up in the photo - notice the ink and printheads on table. |