|
Repairing HP
DesignJet , Z3100, Z3200ps, Z Series Printers
Creating a 1728 Patch Target
Repairing Z3200 Printers - Notes on Tools,
Materials, and Procedures
How to do basic things with Z3200psprinters
Mark Lindquist 12/10/2014 - updated --1-03-2017
Creating a 1728 Patch Target - Reading and Installing it in Paper Preset
Management. (For Mac)
Special thanks to Geraldo Garcia for his tutorial on
Luminous-Landscape Forum, and to
Ben Lindquist for creating ICC GEN for me to be able to use Argyll
software without having to go into terminal.
Geraldo's tutorial inspired mine. The process is largely the same,
but from a Mac perspective.
Geraldo's tutorial is found here:
LINK TO GERALDO'S TUTORIAL
1. First
create and load a sheet or roll of the new custom paper - configure
preset in the calibration dialog box.
2. Calibrate the paper.
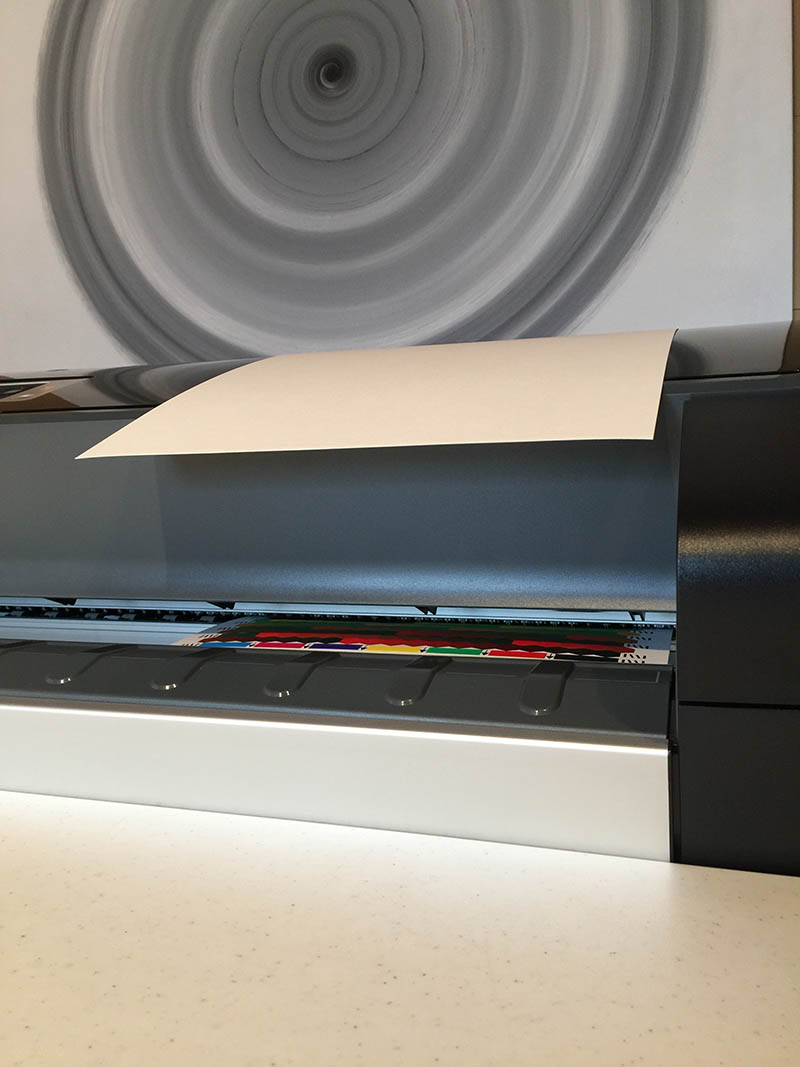
3. Load a new sheet or roll to create the 1728 patch
chart. Feed the sheet or roll in prior to starting this procedure.
Be sure the correct paper name is chosen. You may choose to use
sheets, for example, 13x19, and hand feed them, or you can use roll
paper. For example, a 1728 patch target requires (3) 13 x 19
sheets.

Above, (3) 13" x 19" sheets taped together on the back side with
lightweight clear packing tape. Choose load roll.
(Taping sheets together sometimes works, sometimes doesn't.
Better to use actual roll or separate cut sheets.)
4. Then go back in and choose that paper
and choose "Color Measurement" at the bottom of the drop down menu.
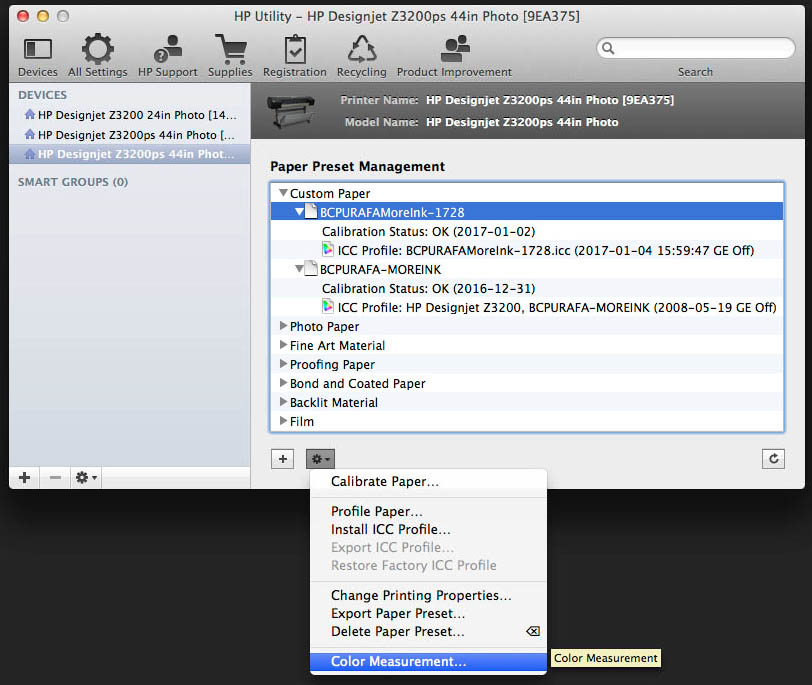
Next, Choose "Print a color chart for
later measurement"

Next, choose RGB 1728 Patches (12x12x12) (You
can choose others, but I am using the 1728 version
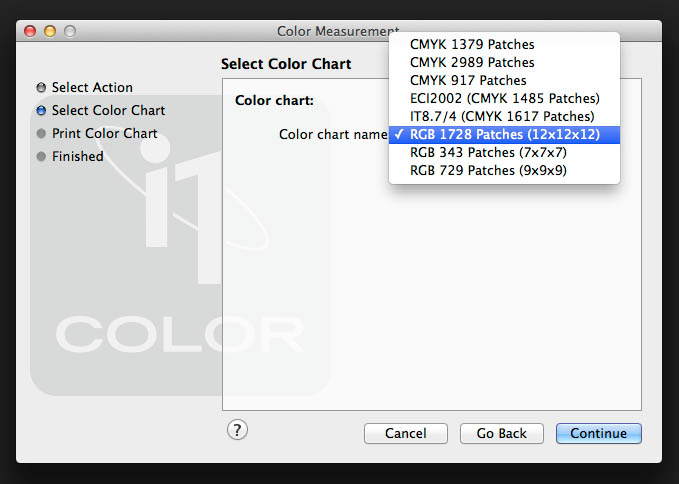
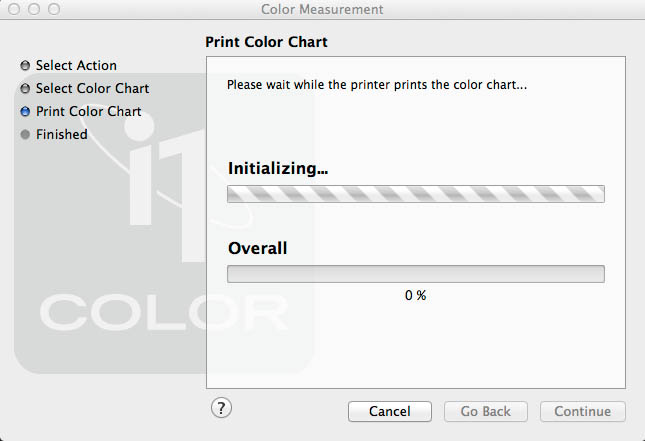
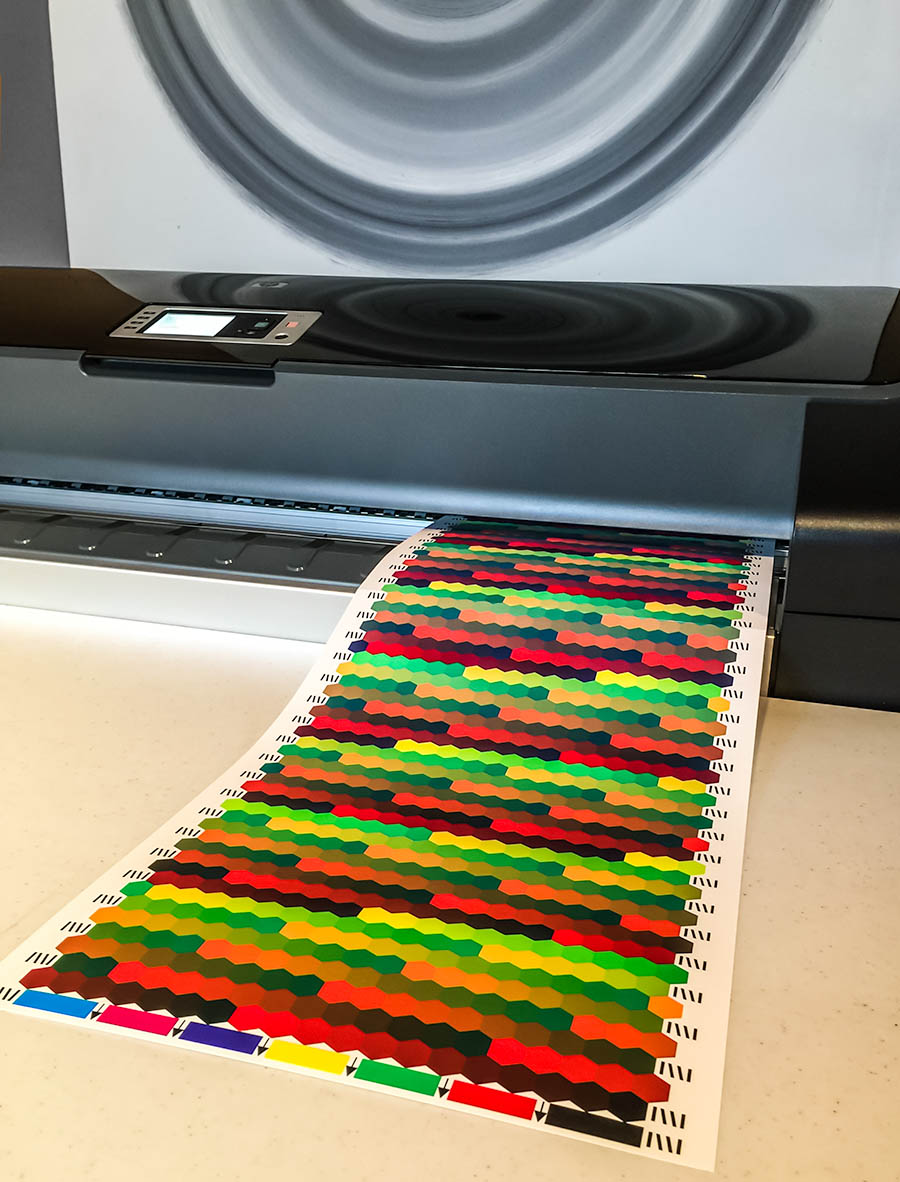
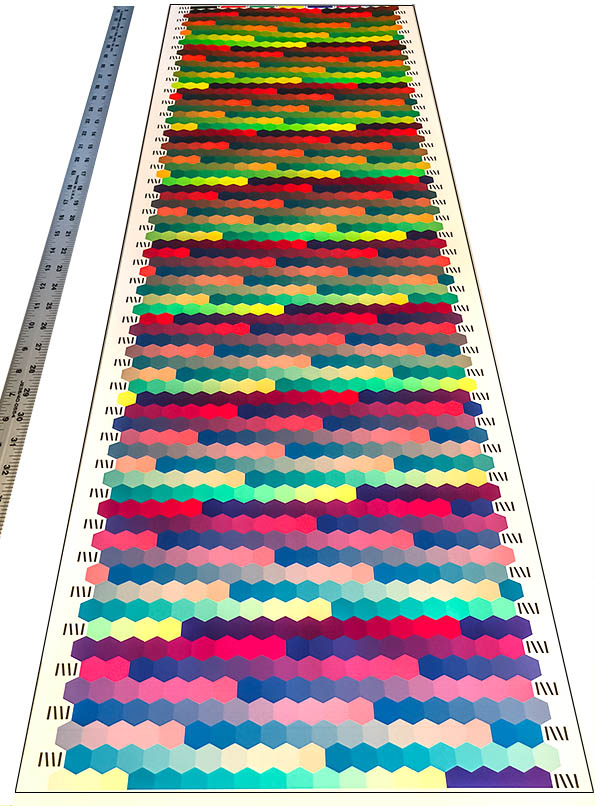
I let the
patch chart dry overnight. Then I load the chart in the same
way it was originally printed (Straight through on top of the
spindle) making sure to call it a roll, not sheet, when it is taped
on the back, and wait for the printer to say it is ready for
printing. The taping together the 13 x 19 sheets works but it
must be accurately assembled. I mostly just hand feed
the 13 x 19 sheets in landscape direction and that seems to work OK
too.
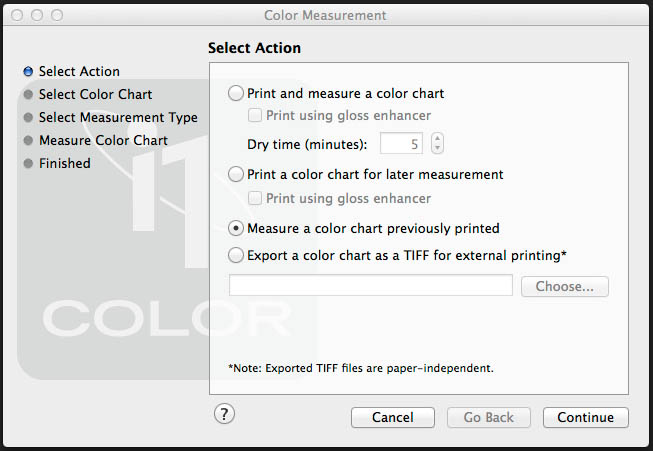
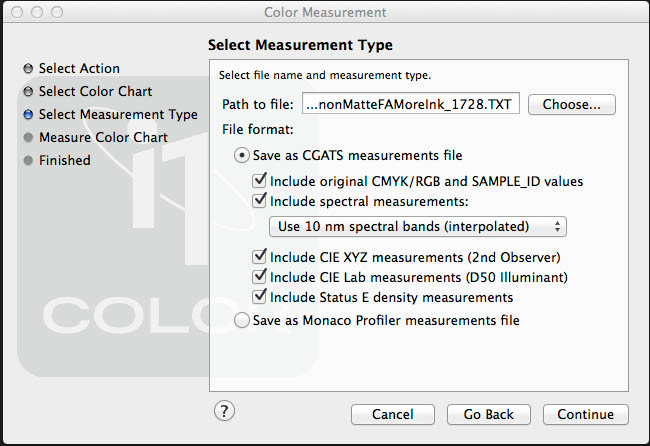
(It is important to check all boxes and leave
measuring at 10nm).
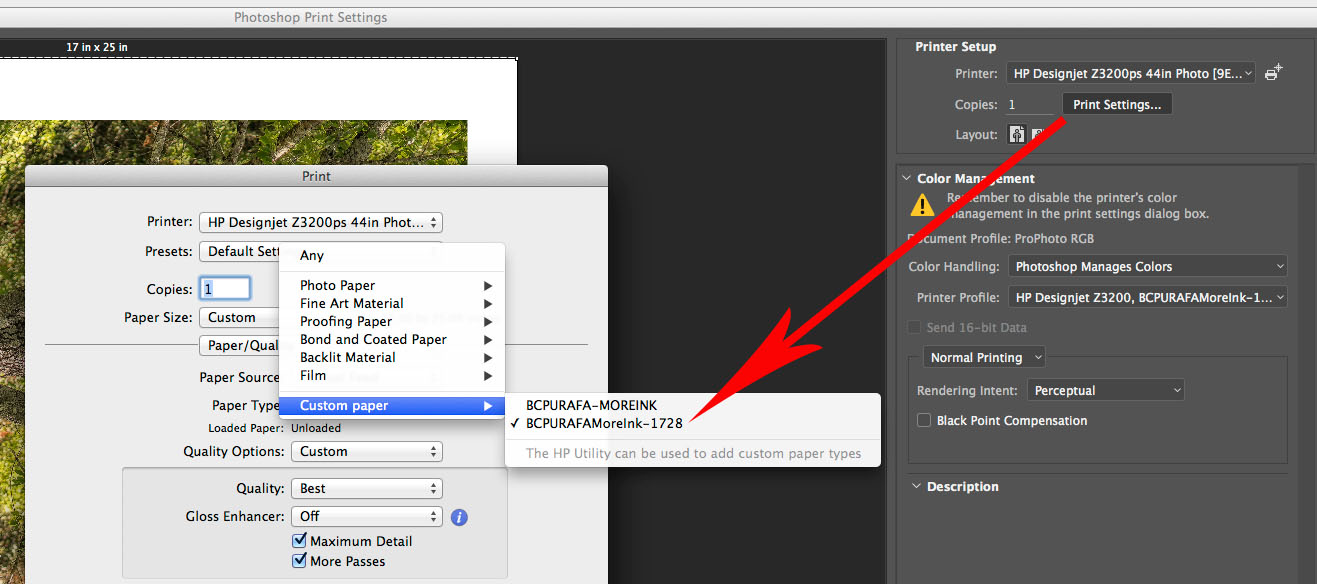
Choose the location and enter the file name you want to use for the
icc profile. It must be the same as the paper you created and
calibrated so you can later match the icc profile to the custom
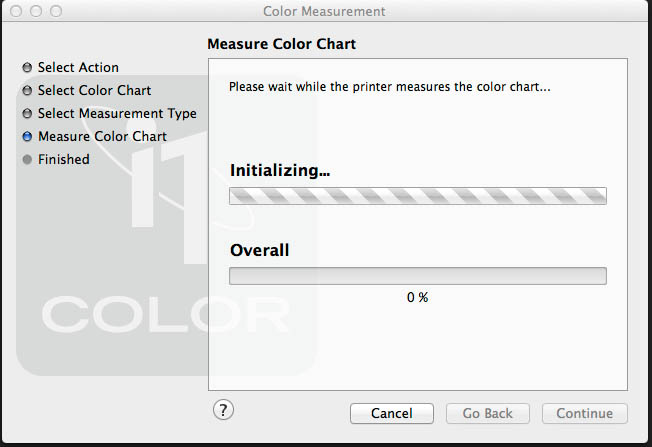
paper in paper preset management.
The printer will initialize and say "ready to
print" - don't let that fool you - it will change to "ready to
scan".
If you make a mistake loading the paper or have a badly taped
sheet, the printer will abort the job. When hand loading sheets, do
it exactly as you would normal paper.
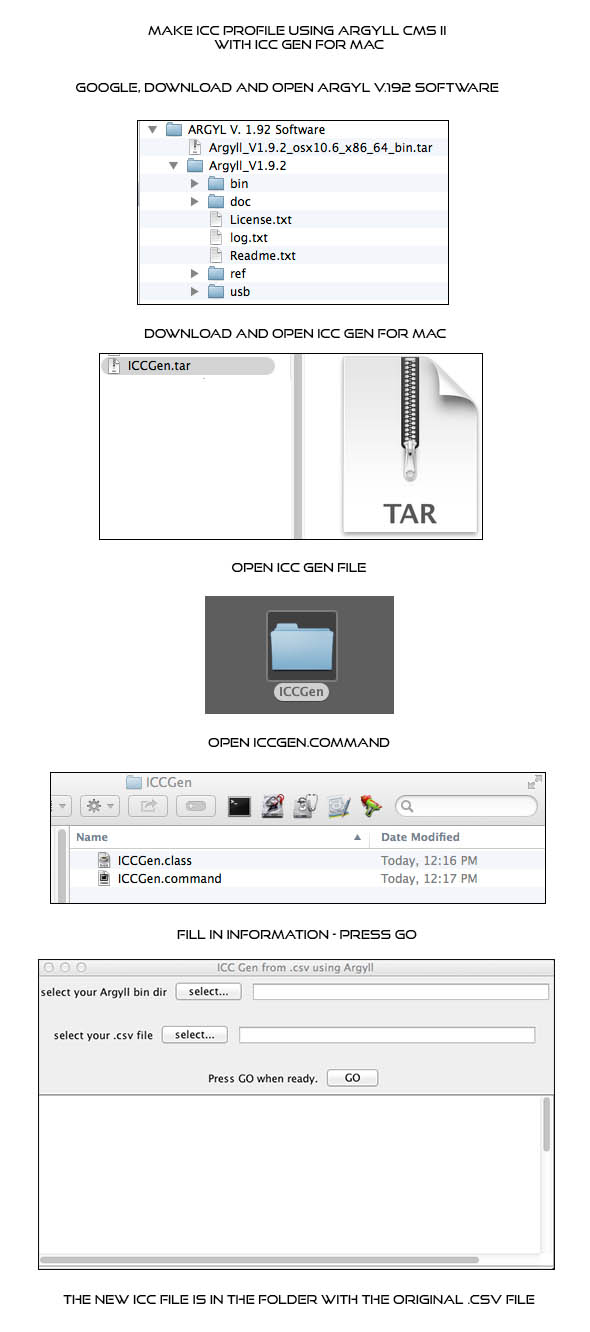
CREATING THE ICC PROFILE
GOOD NEWS FOR NON-GEEK PERSONS.
My oldest son was visiting and I asked
him if he would create a shortcut for me for the terminal. He did me
one better - he created a JAVA program called ICC GEN that let's you
create an ICC profile simply without going into Terminal or the
command line.
ICC GEN for Windows and Mac
 
(* Special thanks to Ben Lindquist)
CREATING THE ICC PROFILE
USING ARGYLLCMSII SOFTWARE VIA ICC GEN JAVA SOFTWARE
I use Argyll CMI II
software and a JAVA interface built by my son to convert the .cvs
file to .ICC profile.
This is a 3 step download/install process:
1.
CLICK LINK TO =>
DOWNLOAD JAVA FOR
YOUR SYSTEM
2. CLICK
LINK TO =>
DOWNLOAD ARGYLLCMSII FOR WINDOWS
DOWNLOAD ARGYIICMSII FOR MAC OS
(Please consider donating to the Argyll Software website)
3. CLICK LINK
TO =>
NEXT, I use ICC GEN to create the ICC profile
Install ICC GEN or use Argyll any other way you prefer, or
any other software that will convert the .csv, or .txt file to an
ICC profile. I1Profile, RGB DROP, and many other programs will
do the same thing. The ICC GEN program is made in Java and
only works for both Mac and Windows systems. READ directions for installing and
using. There is no technical suppoprt for
ICC GEN. ICC
GEN simply harnesses Argyll software and runs the
commands. All
you have to do is find the Bin folder where you have
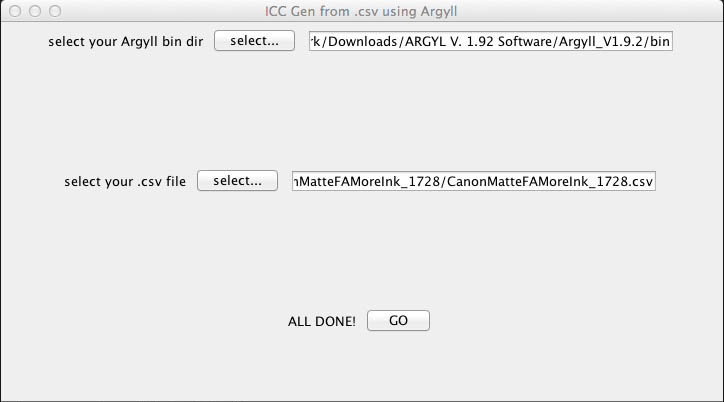
downloaded Argyll, and input that into the top selection, then
specify anywhere you would like ICC GEN to put the finished ICC
Profile. Press GO then wait, and after a while it says it's done
and the ICC profile is with the .csv file.
Instructions below are for Mac, however they
are the same for Windows.
OPEN THE ICC GEN FOLDER and DOUBLE CLICK ON ICCGen.cmd - it will
open the dialog window.
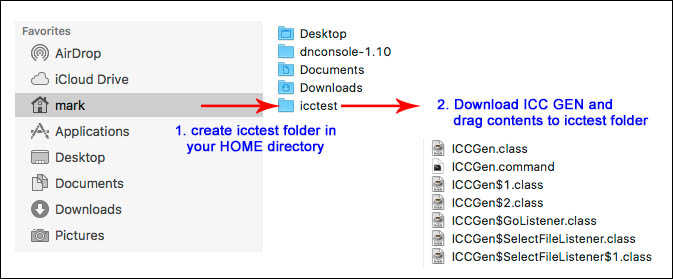
IMPORTANT INSTRUCTIONS:
CREATE a FOLDER in your HOME
DIRECTORY CALLED icctest.
DOWNLOAD ICC GEN AND
INSTALL ALL FILES in the icctest folder in your home folder:
Next, Find the .ICC file (which is in the same file as your .csv
file) and install it in the paper preset management under the
exact profile that was created as a preset for the paper
calibration. (It installs on top of the old profile and becomes the
new profile.
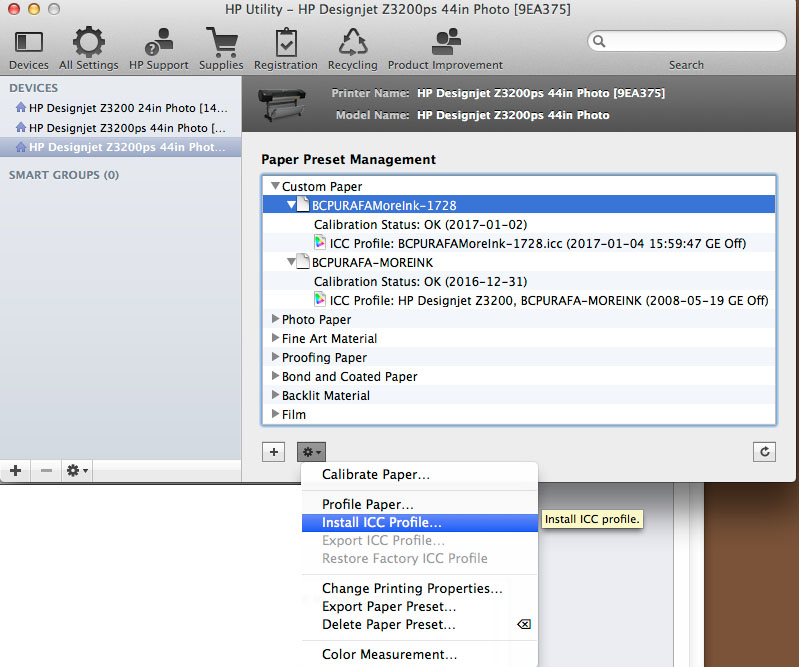
The printer installs the profile and puts it in the list with the
other papers and .icc profiles

Special thanks to Geraldo Garcia for his tutorial on
Luminous-Landscape Forum, and to
Ben Lindquist for creating ICC GEN for me to be able to use Argyll
software without having to go into terminal.
Geraldo's tutorial inspired mine. The process is largely the
same, but from a Mac perspective.
LINK TO GERALDO'S TUTORIAL
Special thanks to Graeme Gill for
ArgyIICMS
ICC GEN uses V 1.9.2
The profile is set up to generate an RGB profile for use with
relative colormetric rendering intent.
Future iterations may include others, such as perceptual, etc.
This tutorial is for my own notes so that I can come back and
remember how to do it, if I forget a part of it.
If you use the tutorial, do so at your own risk. I make no
guarantees. This is just how I do it on my Mac system.
|