|
PSU REPLACEMENT - FAN
- ON HP Z3100 and Z3200 Printers
Notes on Tools, Materials, and Procedures by Mark Lindquist
Power Supply Unit Fan Replacement
HP DesignJet Z3100 - Z3200
Mark Lindquist 12/10/2014 - updated --1-10-2017
Fan replacement on
the HP DesignJet Z3100 - Z3200 PRINTER
By Mark Lindquist |
August-December 2014-1/5/2017
© 2017 Lindquist Studios All
Rights Reserved
PSU FAN Replacement Z3200 Printers
REPLACING THE HP Z3200 POWER SUPPLY UNIT (PSU) FAN
If you hear a loud noise coming from the left side of the printer as you
face it, and it seems to whine or squeal, and it continues to get worse
over time, it's probably the power supply fan. Amazing that such a small
thing can make so much noise!
For some reason HP determined that inexpensive parts were adequate for
this printer. A case in point is the power supply fan. When I took the
power supply apart to get at the fan I was really surprised to find that
it was essentially a $3.24 Computer fan with sleeve bearings. It is
unfathomable to me is that a fan that is required to run 24 seven 325
would be so cheap.
If you want to know the exact fan that is used in the HP Z3200ps 24”,
here it is:
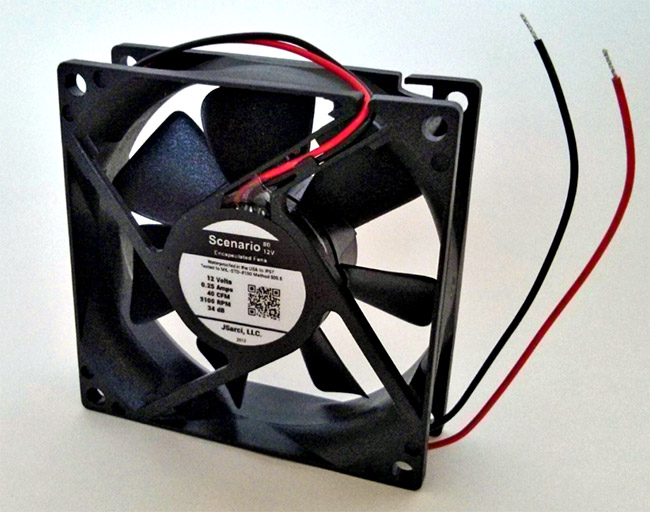
The fan that was used in my HP Z3200 24" is a Sunon KD1208PTS1 13.GN 12V
DC

http://datasheet.octopart.com/KD1208PTS1.13.GN-Sunon-Fans-datasheet-9566827.pdf
Here is a photo of the old fan moments after it was removed (check out
the crud on it) you’ll see why blowing compressed air in there is just
not going to get it.
The crud gets caked on!

Ultimately, HP doesn’t have any information about replacing the Power
Supply Unit fan. It takes a ton of work and time to just replace the
fan, (because of having to take the power supply unit apart) so I’m sure
they only wanted their field technicians to replace the entire power
supply and be done with it, due to the cost of labor and difficulty of
tedious work in the field. There are companies who will trade you your
entire PSU for theirs, which has had a new fan put in and is
“refurbished”. The cost will be anywhere from $200 - $600. Google “HP
Z3100 Power Supply Unit Replacement” and you’ll find more than you want
to know.
In order to get at the fan it takes removing upwards of 40 screws from
the power supply unit and a lot of futzing around just to expose the
fan. Having actually pulled the power supply unit and opened it up and
replaced the fan with a quality fan I can say that it is quite a job but
not an unsurmountable one and with a little patience and perseverance it
is certainly doable.
The fan is essentially a simple computer case fan and you can find any
number of them online. If you want to take the easy way out, get an
entire PSU with who knows what fan they put in there and how, and send
yours off, never to be seen again. Just hope they sent you a “good one”
back! If you don’t want to get into replacing the fan yourself - take
the easy way out, send your PSU here.
I made the decision to replace my own fan so that I could clean the
circuit boards and inspect everything, plus I have an innate curiosity
about how things work. I figured I could take the power supply unit
apart, replace the fan and put it back together in an hour. Wrong. It
takes a couple to 3 hours, anyway, but I work slowly and carefully.
I got a waterproof fan because I figure they are made to withstand a lot
more climate issues. Just get one that has ball bearings instead of
sleeve bearings. I also got this fan because I knew I could easily
splice the wires into the plug and wires of the old, existing fan. It
was an easy fix - just nipped the old fan wires off about 5” past the
plug and soldered everything together and used heat shrink tubing and a
heat gun to go over the soldered areas.
Scenario80 12v - 80mm 12v BLDC Waterproof Fan IP57 - I got mine on
Amazon, but they don’t seem to be available there anymore.
NEW INFO on Replacement Fan - see below photo
NEW INFO ON
ALTERNATIVE FAN REPLACEMENT FROM PAUL BROOKS:
80mm fan alternative made by ADDA:
https://www.ebay.com/itm/80mm-25mm-Case-Fan-12V-67CFM-PC-CPU-Computer-Cooling-2-Wire-Ball-Brgs-8025-304-/181048018807?_trksid=p2385738.m4383.l4275.c10
80mm 25mm New Case Fan 12V 67CFM PC CPU Computer Cooling 2pin Ball Brgs
304*
This 80mm x 25mm 12V fan, part number AD0812UB-A73GP, has 2 ball
bearings for long life, a 3 pin/ 2 wire motherboard connector and 4 self
tapping screws.
The specifications include;
Voltage, 12V
Voltage Range, 6 to 13.8V
Current, 0.400Amps
Speed, 4500RPM at rated voltage and zero pressure
Flow (Max), 67CFM
Pressure Rise (Max), 0.30inH2O
Noise, 48dBA
THANKS PAUL!
Here is a very effective and simple video on how to take the PSU out,
once you have the printer cracked open:
Simple Screw Location Video
The existing fan is hidden deep in underneath in the back of the PSU. It
gets really dirty and is impossible to get at without taking the PSU off
the printer.
Be careful about taking a compressor hose to it to blow it out (DON’T) -
you’ll blow all that crud all over the electronics inside that are
unprotected.
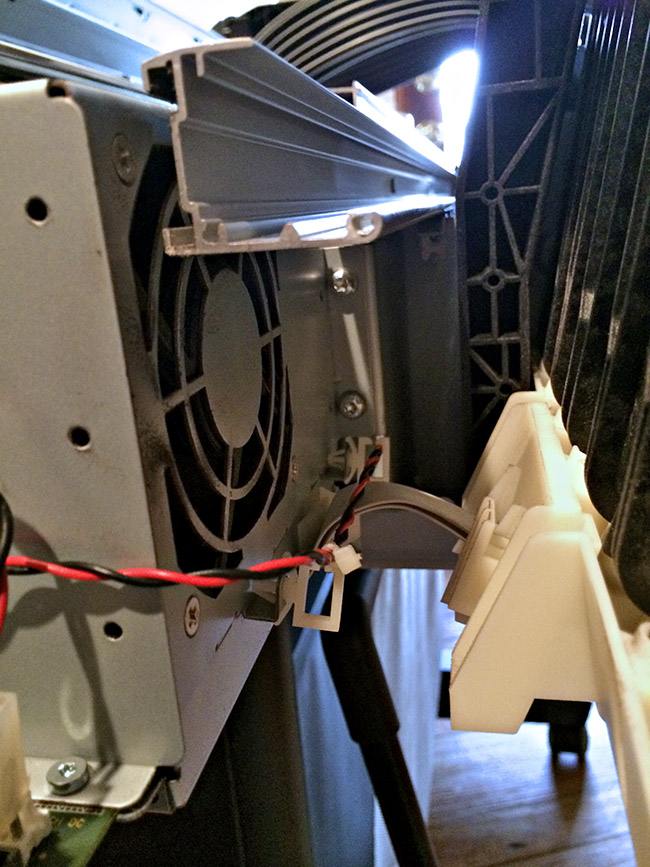
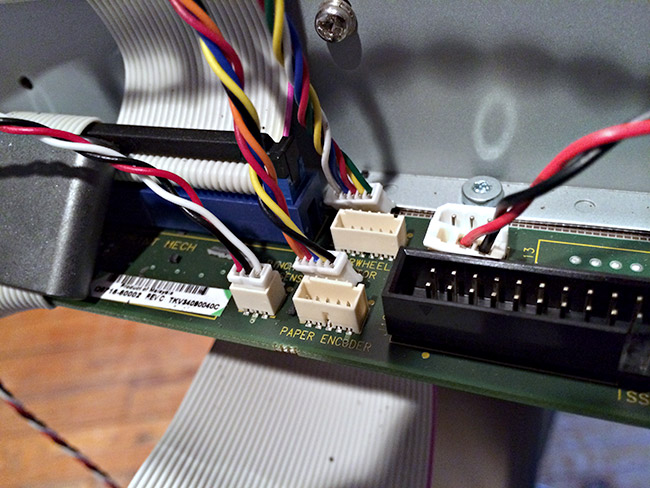
Before you remove any wires, from the PSU (Power Supply Unit), be sure
to take photos of where things go:

Take close-ups so you know where all the plugs go back in:
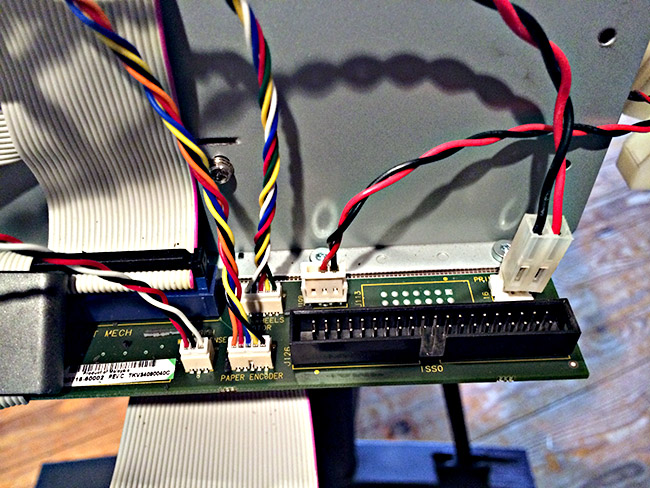
I even took closeups of the wires disconnected:
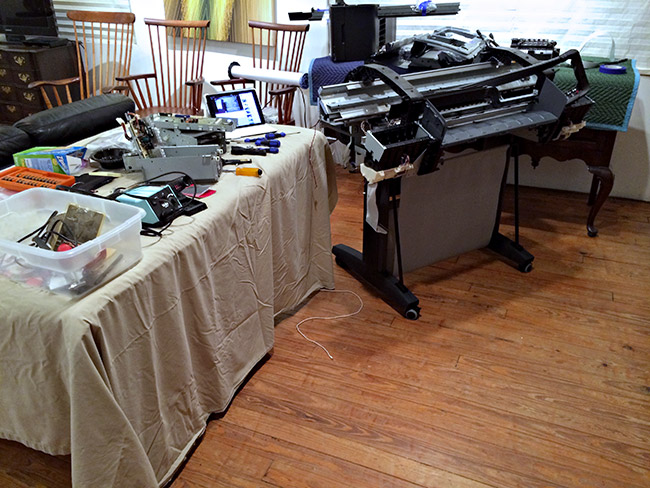
Once I got the PSU off the printer, and went after the screws, carefully
labeling them (photos help) since there are different types of screws, I
set up my soldering iron and tools to be able to work comfortably.
Additional Information:
Here is an excellent very short video about how to remove the specific
screws to release the PSU from the printer:
Designjet T Electronics Module - YouTube
A
short video on repairing the Power Supply
Unit by Les Sheppard: (Thanks Jim Mandraci for the link)
|
(These are my own
personal notes from repairs I have made.
I have made this web page for my own benefit, so I have a record of what
I have done.
If you use this information, do so at your own risk - I
assume no responsibility for errors.) |
|